By continuing, you agree to our use of cookies.
You've been assigned as the data holder for Expenditure, which covers the company's general spending, including business travel, flights, meals, subsistence, purchases (e.g., Amazon orders, gifts, stationery, office furniture), and other uncategorised items.
These should be listed as individual transactions - if you are unsure of the correct data to upload, please request support from the Alectro team and we'll be happy to help!
Uploading your data to our platform is a simple and quick process. Follow these steps to ensure your data is uploaded correctly and seamlessly integrated into the platform.
You'll see the following task in your to-do list here: vso.alectro.io/todo-list

The data should be available as a direct download or export from your accounting software, but some organisations might hold this information in a simple Excel (or similar) format - either is fine.
Each transaction should be represented as a separate line item, and the more detailed descriptions you can provide for each expenditure, the better our analysis will be.
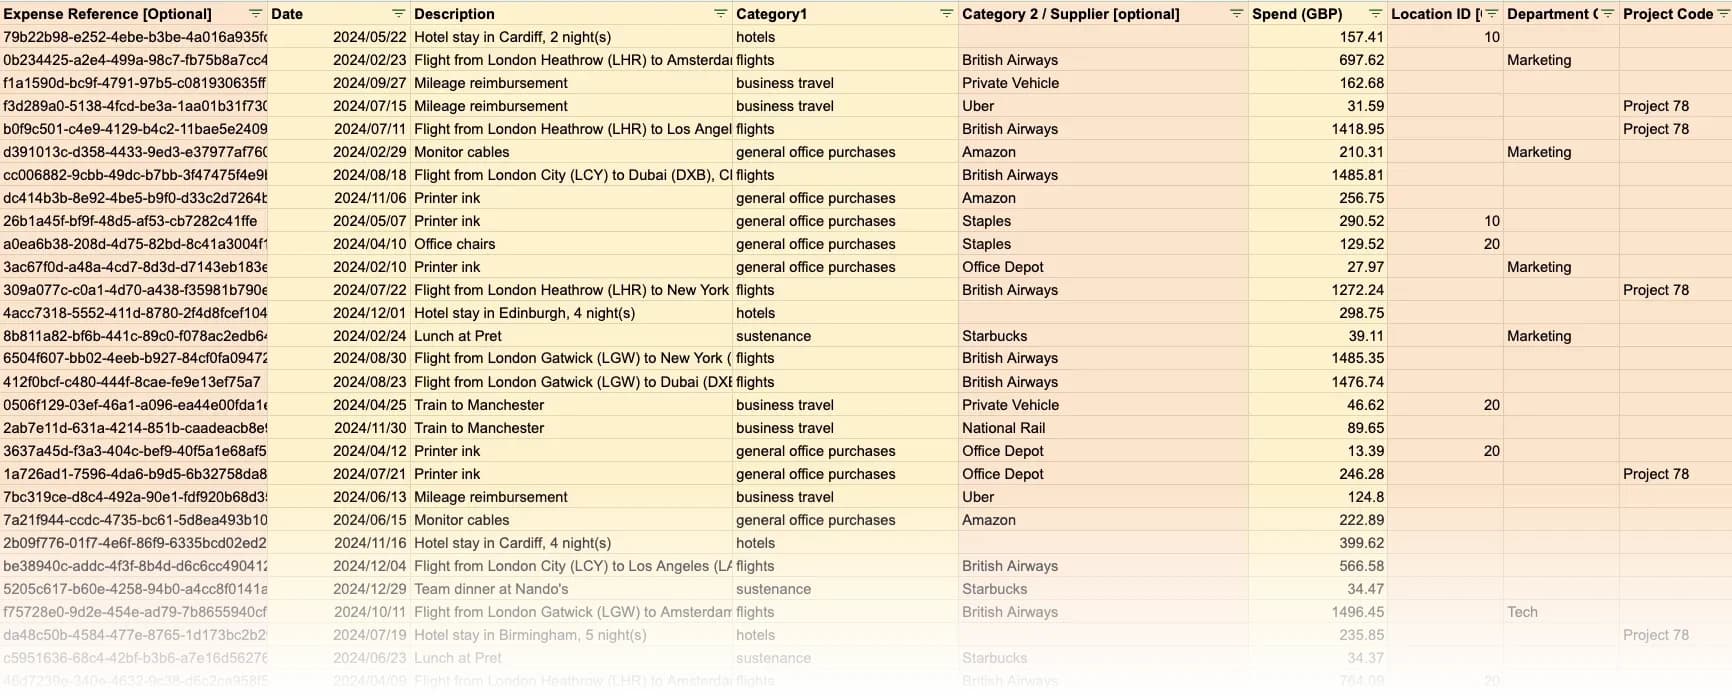
Before uploading your document, ensure that it includes the following required columns:
Date: The specific date on which the transaction occurred.
Note: Ensure this column is in a date format upon upload - we suggest YYYY/MM/DD to ensure consistency.
Description: A top level, clear and concise written description of the item or expense, for example, "lunch at Pizza Express for 4 people.", or "LHR-JFK Business class return flight for 1 person"
Category 1: The primary or top-level categorisation, often corresponding to the Nominal Code name, used to classify the transaction.
Spend: The gross/total cost of the transaction, which can be either a positive or negative value and should encompass all expenditures, including any Value Added Tax (VAT) if applicable.
Optional column:
Expenditure Reference: A unique identifier generated by your accounting system, such as "2023_00001"
Category 2/Supplier: An additional categorisation or supplementary information, which can include details like the supplier's name or a subcategory.
Location ID: If transactions are associated with specific locations, please provide the Location ID as obtained from the template download step.
Department Code: Typically, this represents your cost centre, such as Sales Team or HR, indicating the department or team responsible for the expenditure.
Project Code: If applicable, this code helps categorise transactions related to specific client projects, facilitating project-based accounting and tracking.
As an example, the data might look like this:
If your company arranges travel through agencies such as Flight Centre or similar, it's important to also include these bookings in your data submission. These agencies will provide a full export of all booking details in formats like CSV or Excel.
A request should be made to include all relevant information
To ensure comprehensive data collection, please upload the raw files obtained from these exports alongside your other expenditure data. This practice ensures that all travel-related transactions are accurately captured and analysed.
Although we recommend using the Upload Wizard directly, you may wish to upload the data in its raw format.
Once the data is in the correct format, you can click "Upload Raw Data" to upload the data. Please note, this will delay the processing time of the data.
We'll do the rest from here, and we'll be in touch if we have any questions regarding the data.
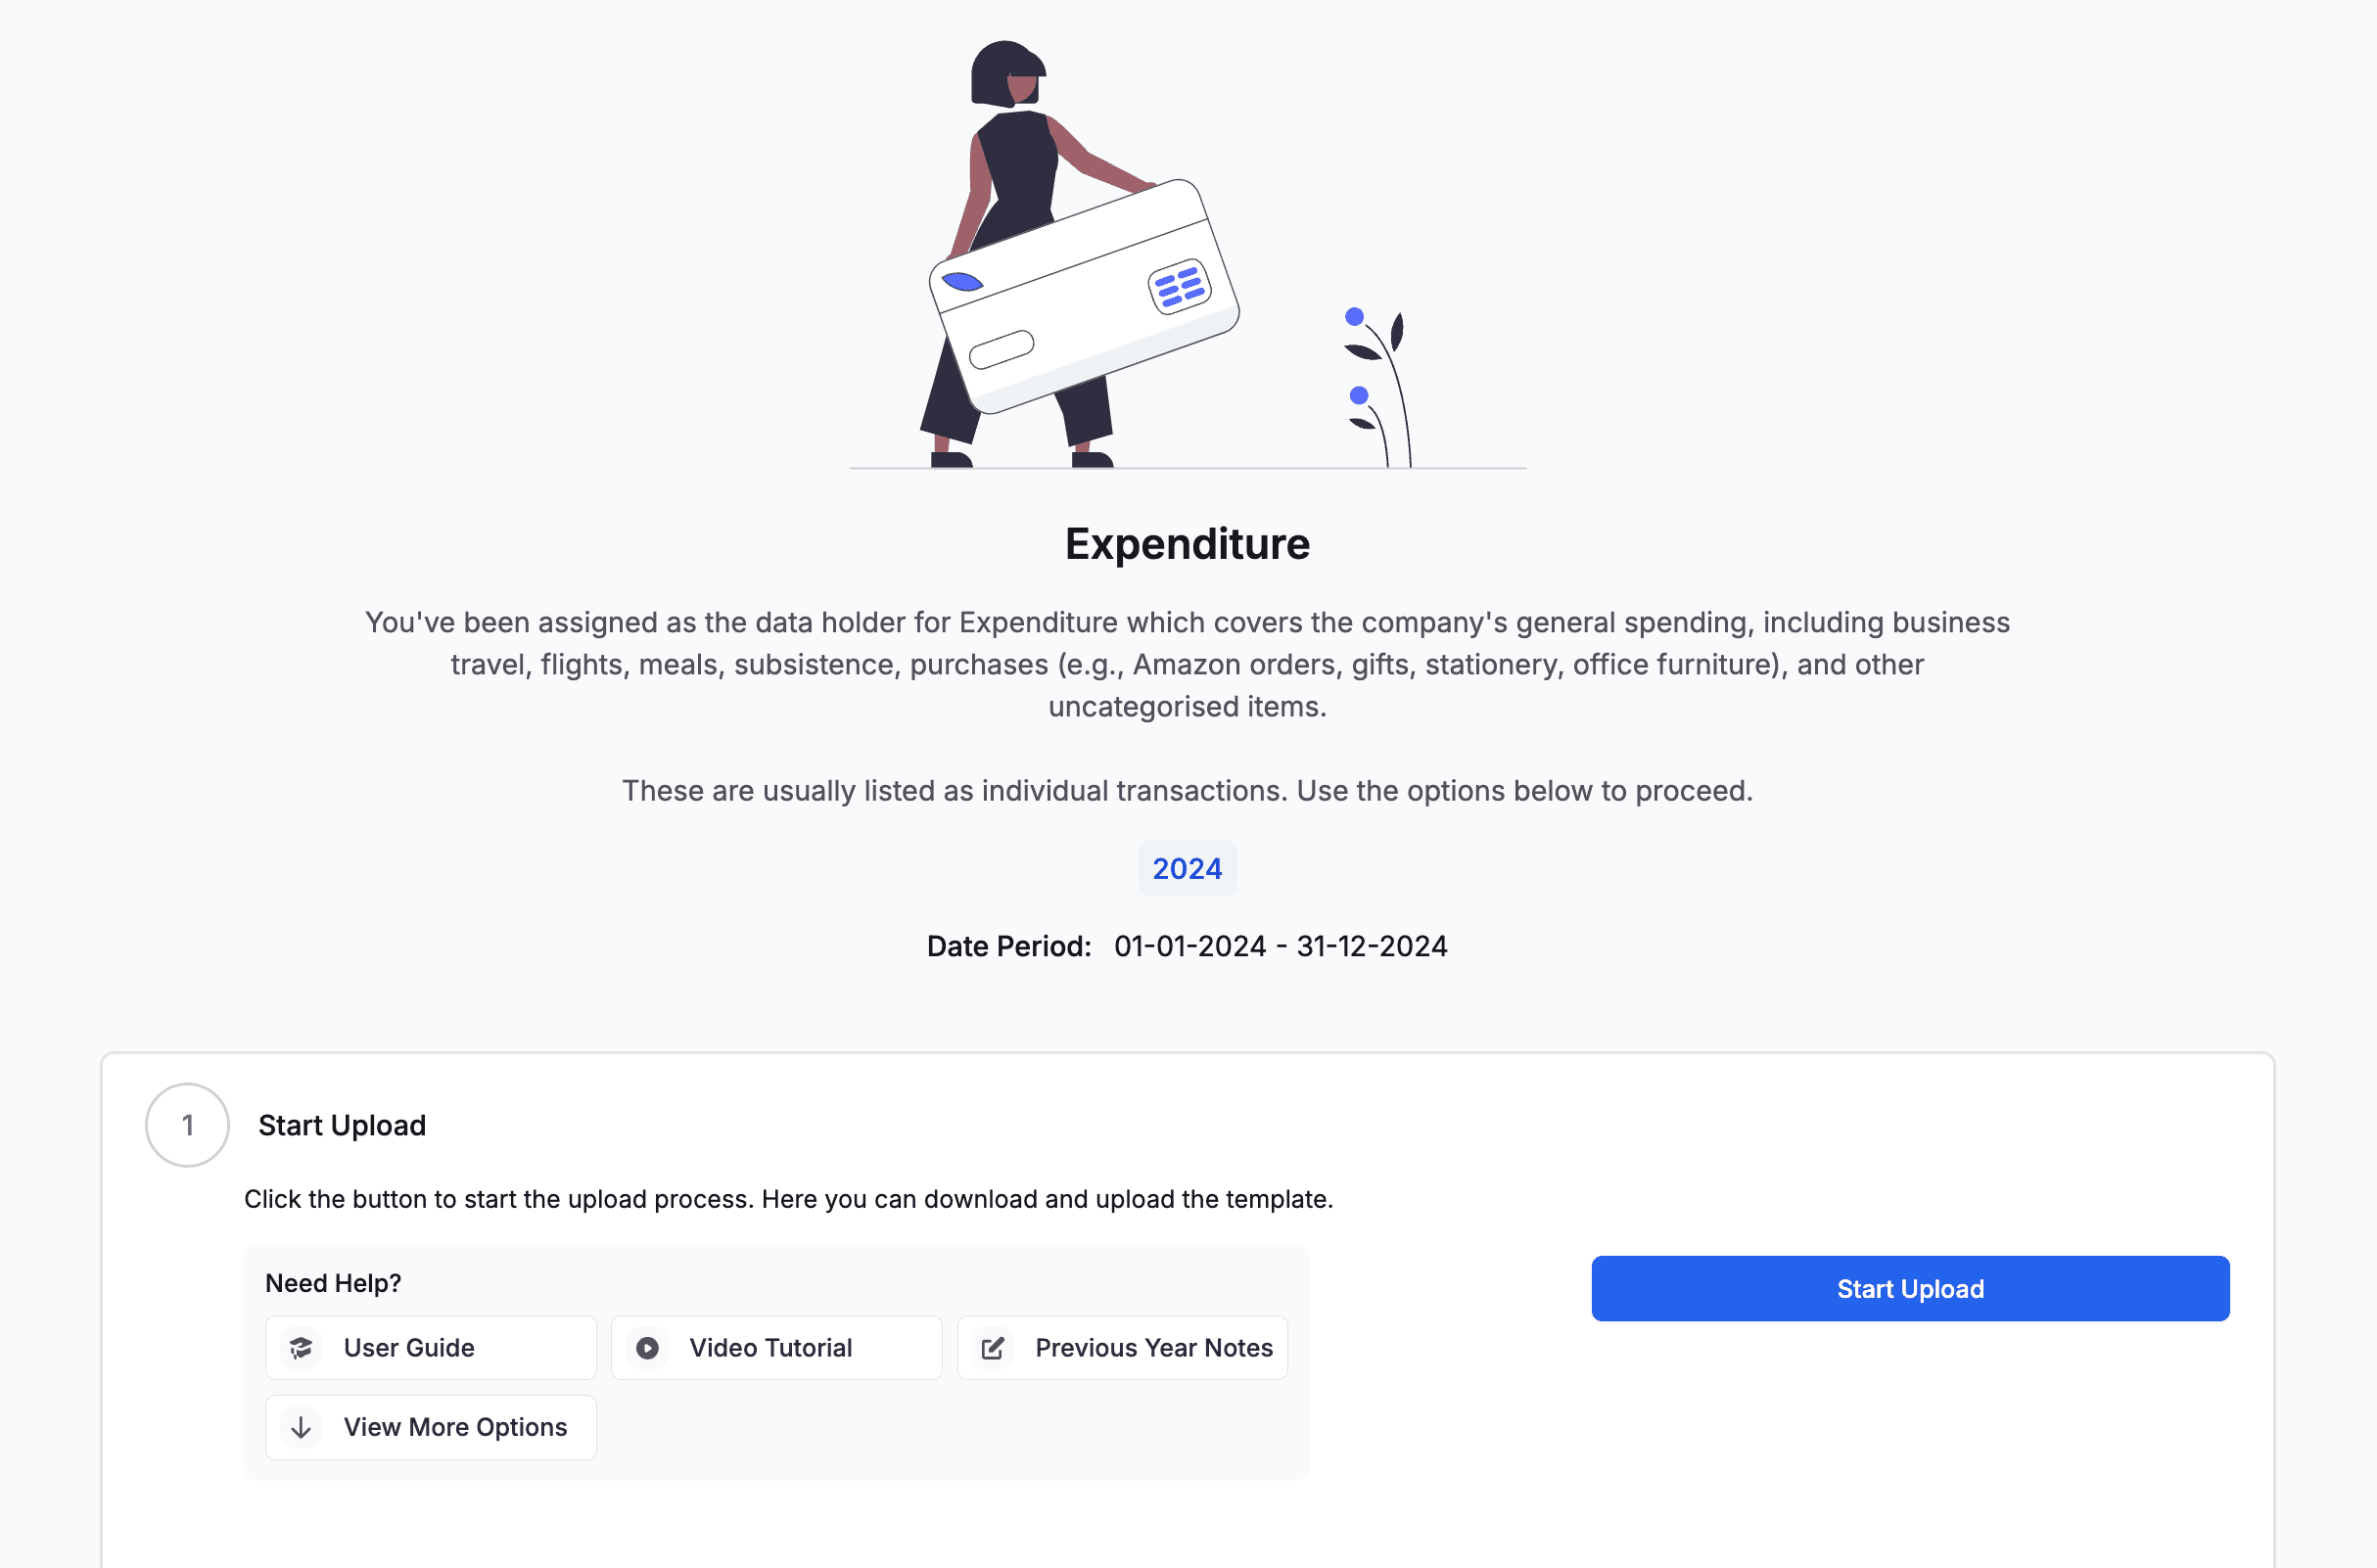
When you click to begin your task, you'll see the onboarding panel.
Click Start Upload to upload your file.
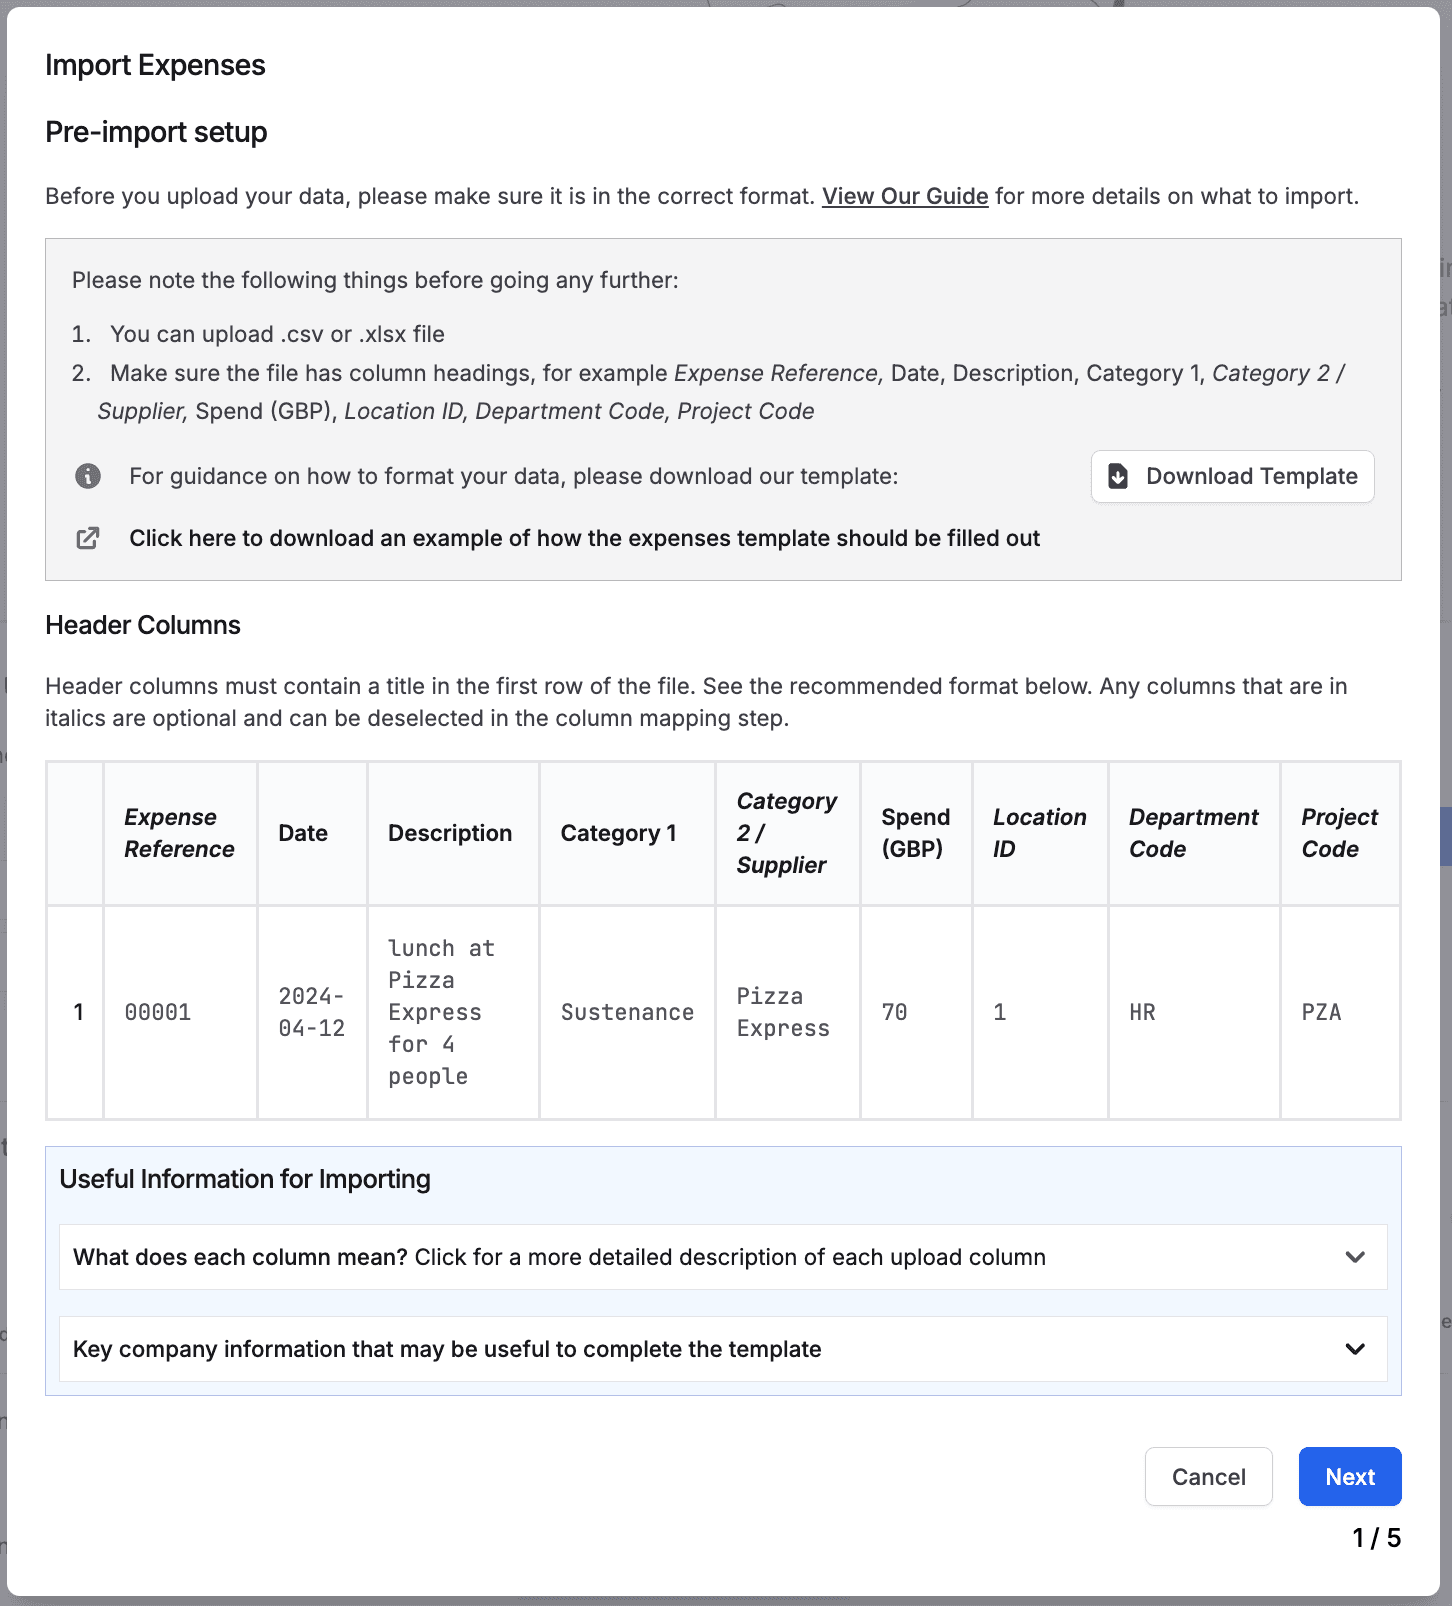
Check your data contains the correct headers and is for the correct Reporting Period.
The platform supports the following file formats for uploading:
CSV (Comma-Separated Values)
XLSX (Microsoft Excel)
To download a file template click "Download Template"
Or to download an example of the data use the "Click here to download an example of how the supply chain template should be filled out" link
When you're ready to proceed, please click Next.
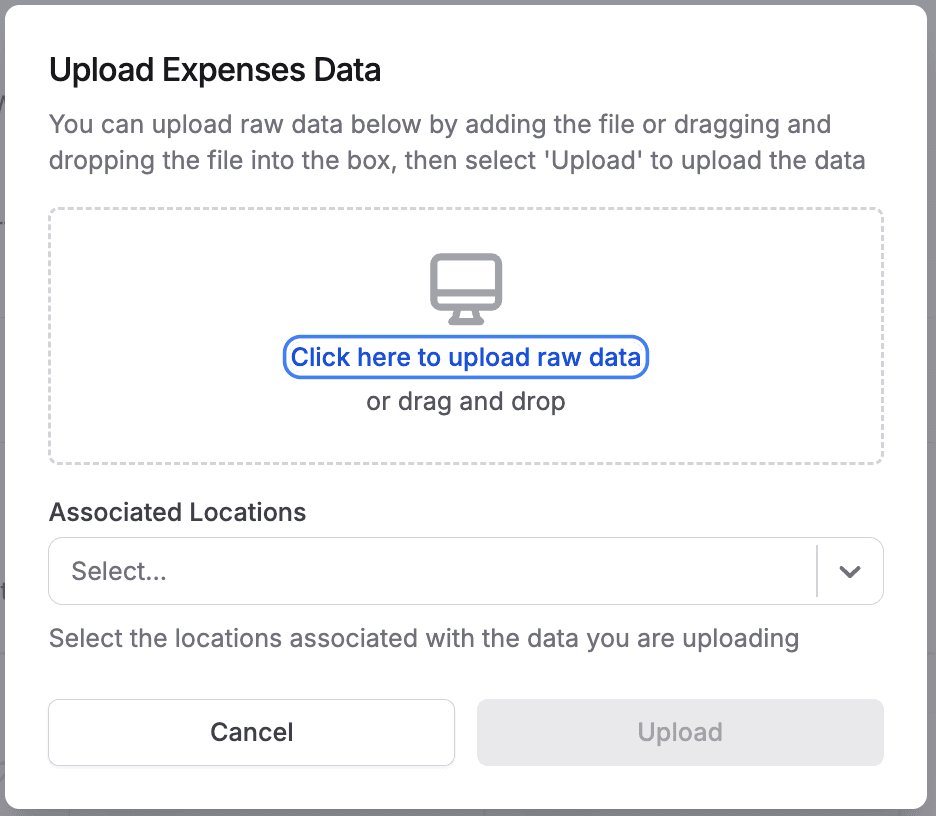
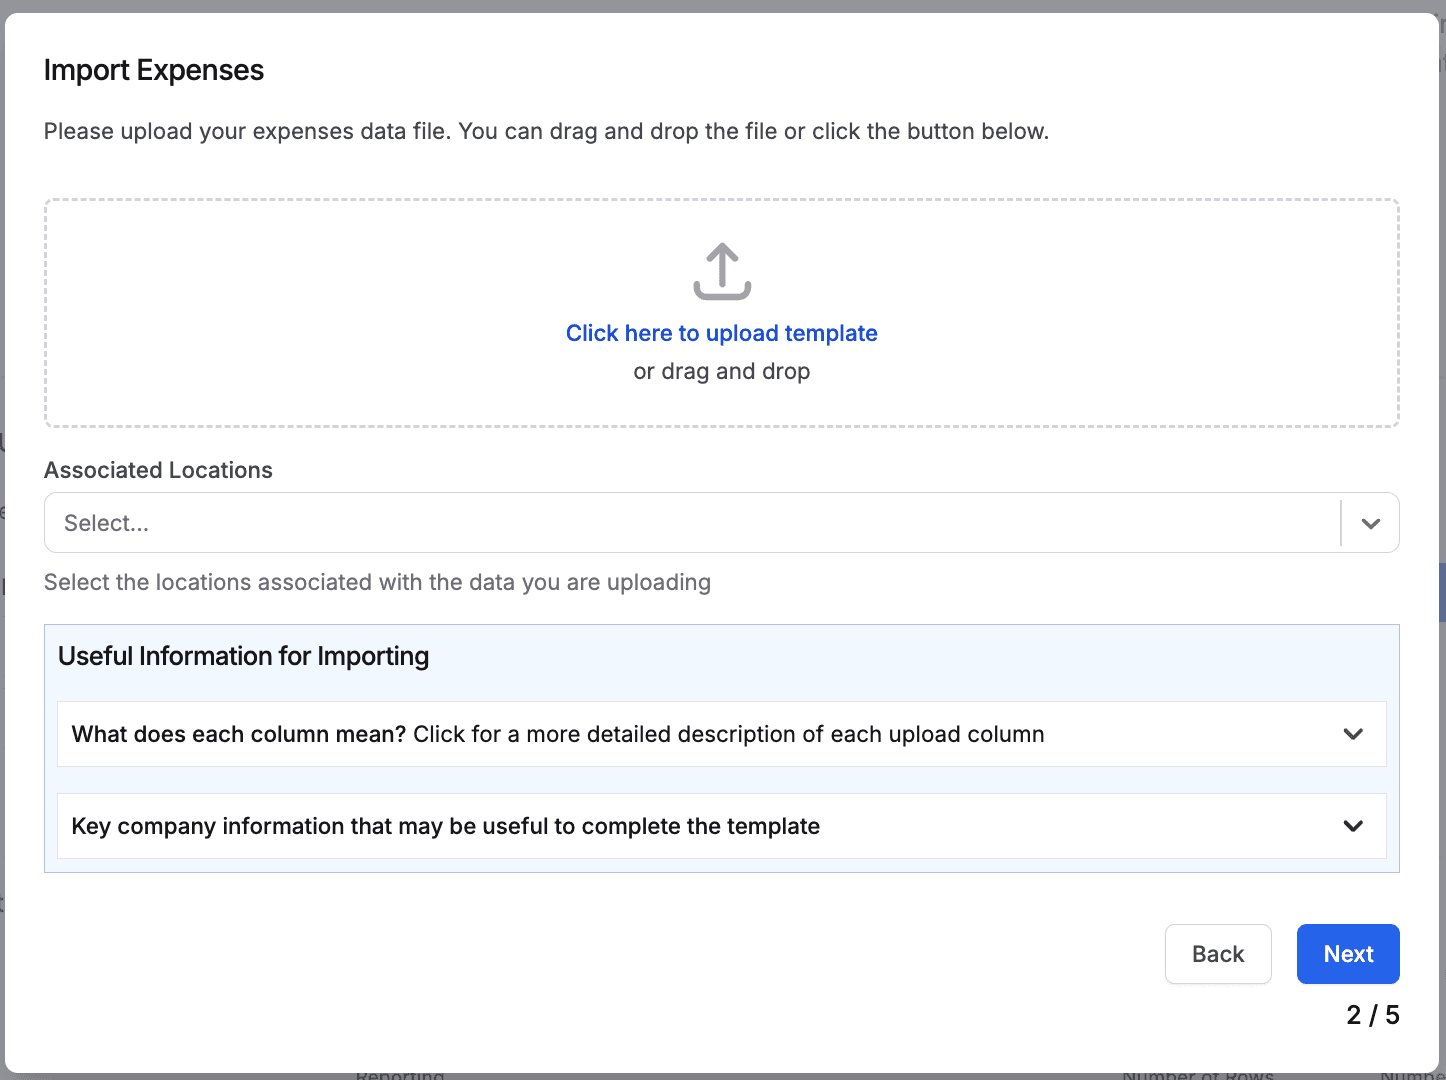
Please upload your data file - you can drag and drop the file or click the button to add your file.
Once added, you'll see the filename in the upload box.
Use the dropdown menu to select which locations the data is associated to.
Once uploaded, click Next.
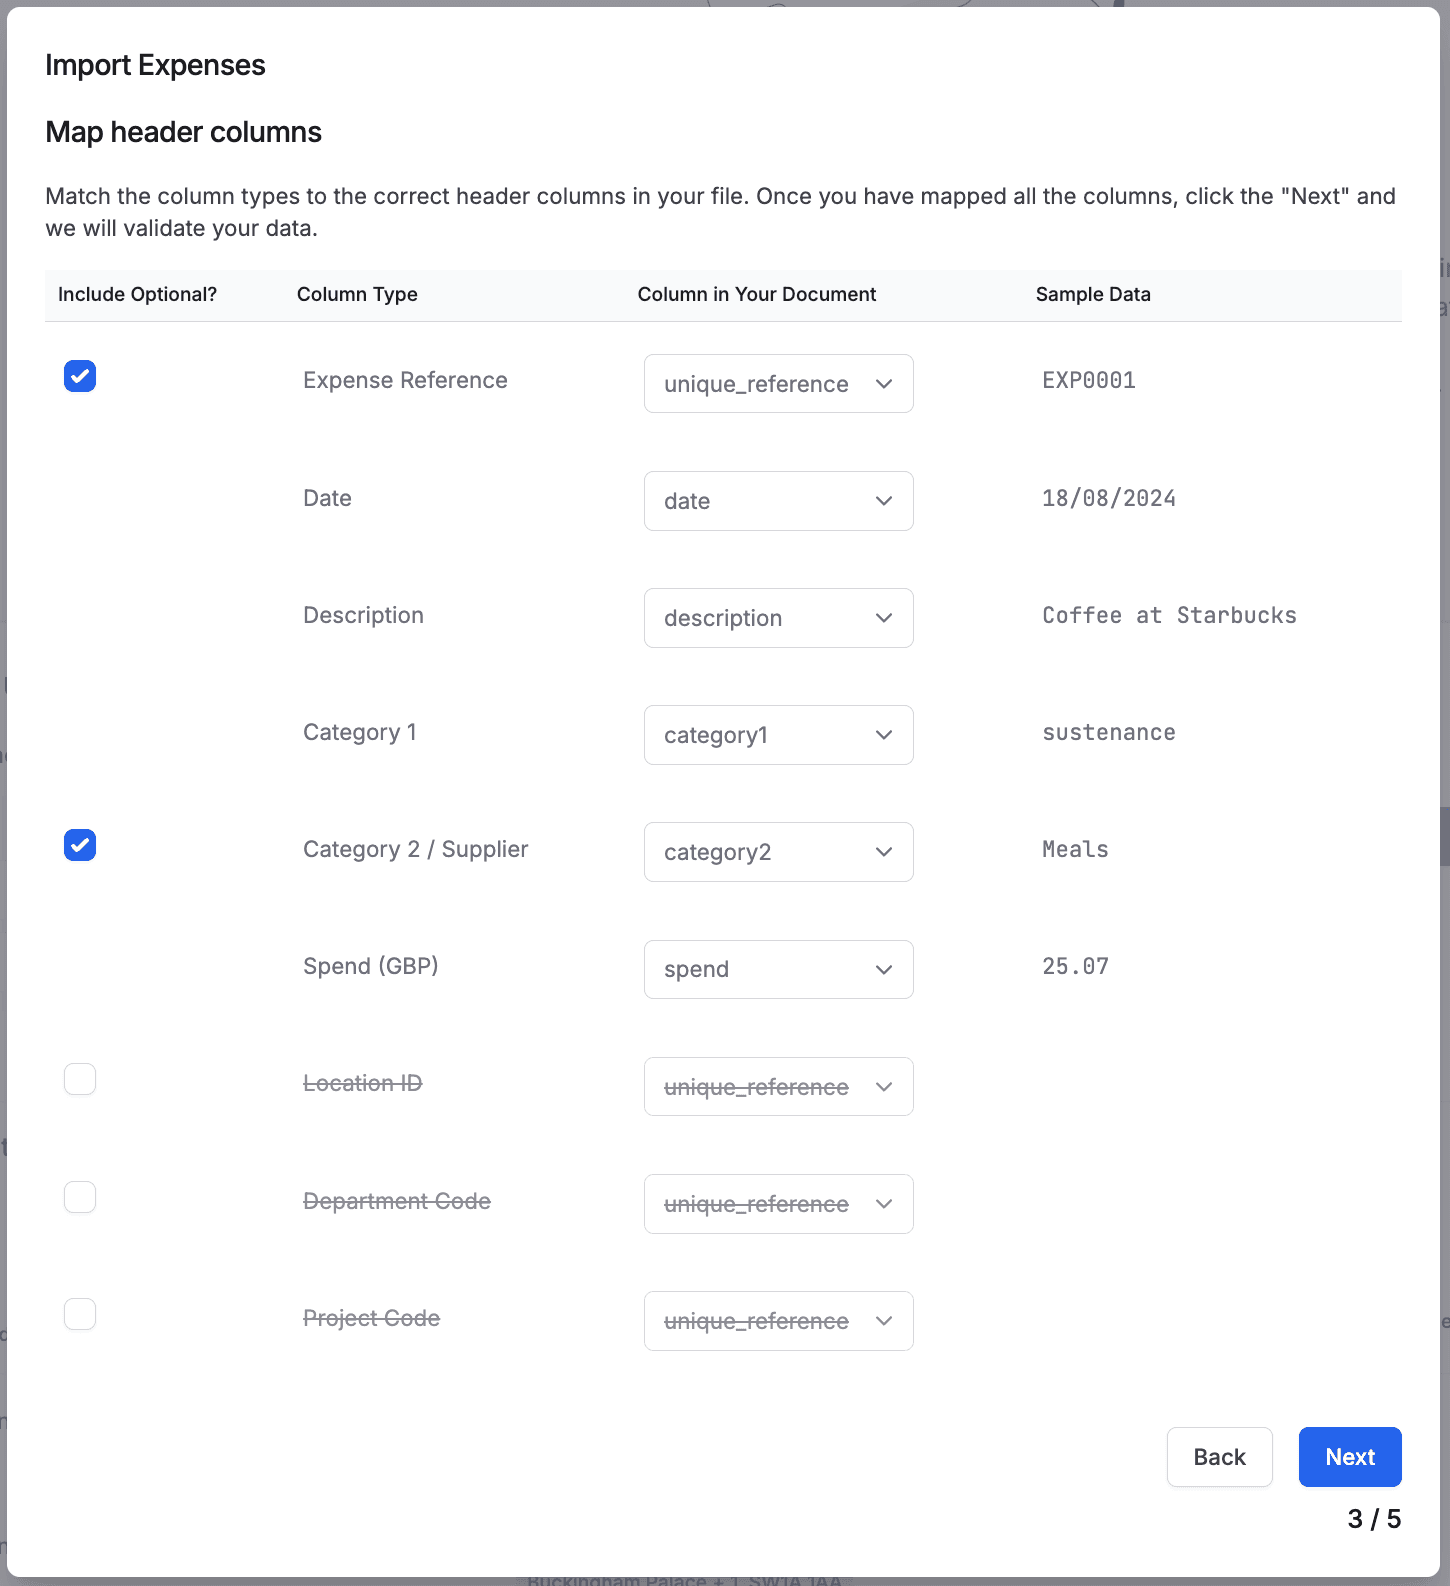
Match the column types to the correct header columns in your file.
If you want to include the Expenditure Reference column, please tick the box.
Once you have mapped all the columns, please click Next.
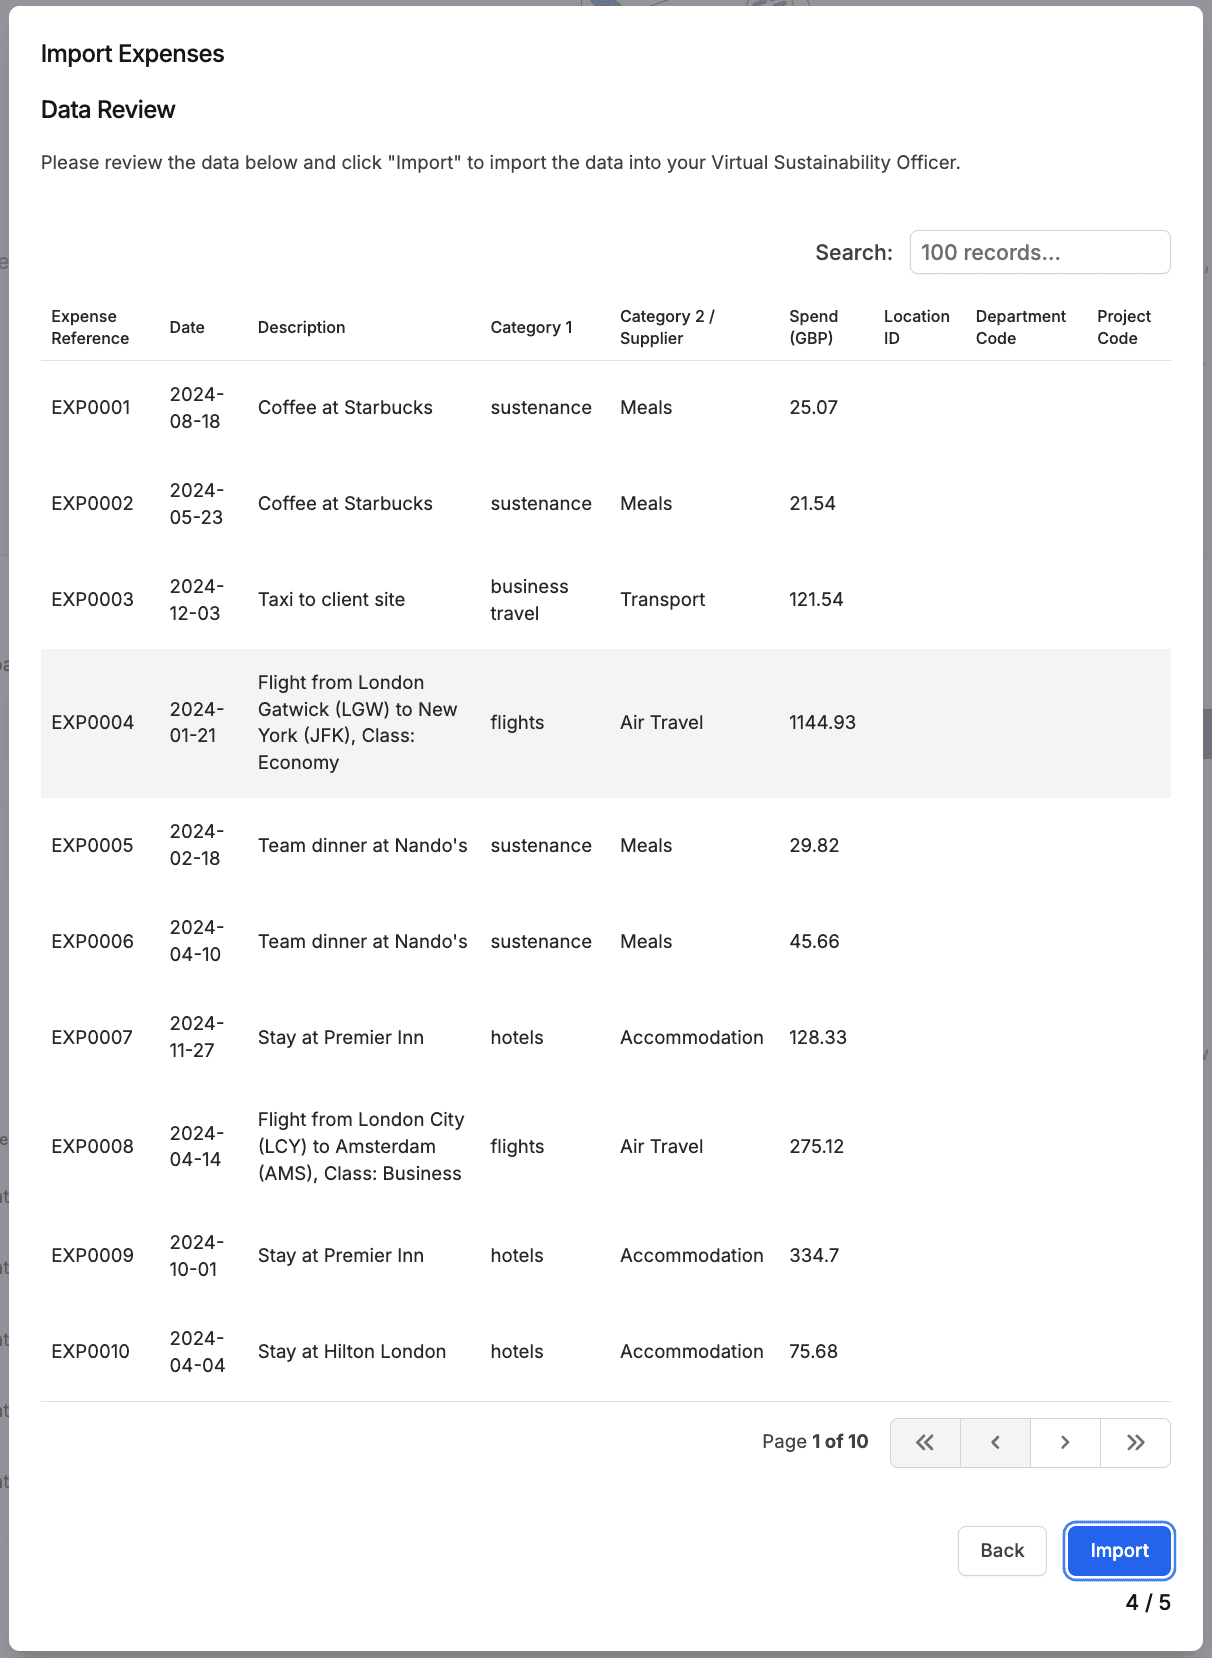
The platform will automatically validate your file to ensure all required columns are included and formatted correctly.
You will need to go back and re-upload your file if there are errors, but the platform will tell you the cause of these errors and where they are in your file to make it easy to correct them.
You can see the most common errors with data uploads here: Troubleshooting Common Errors
Click Import when you're ready.
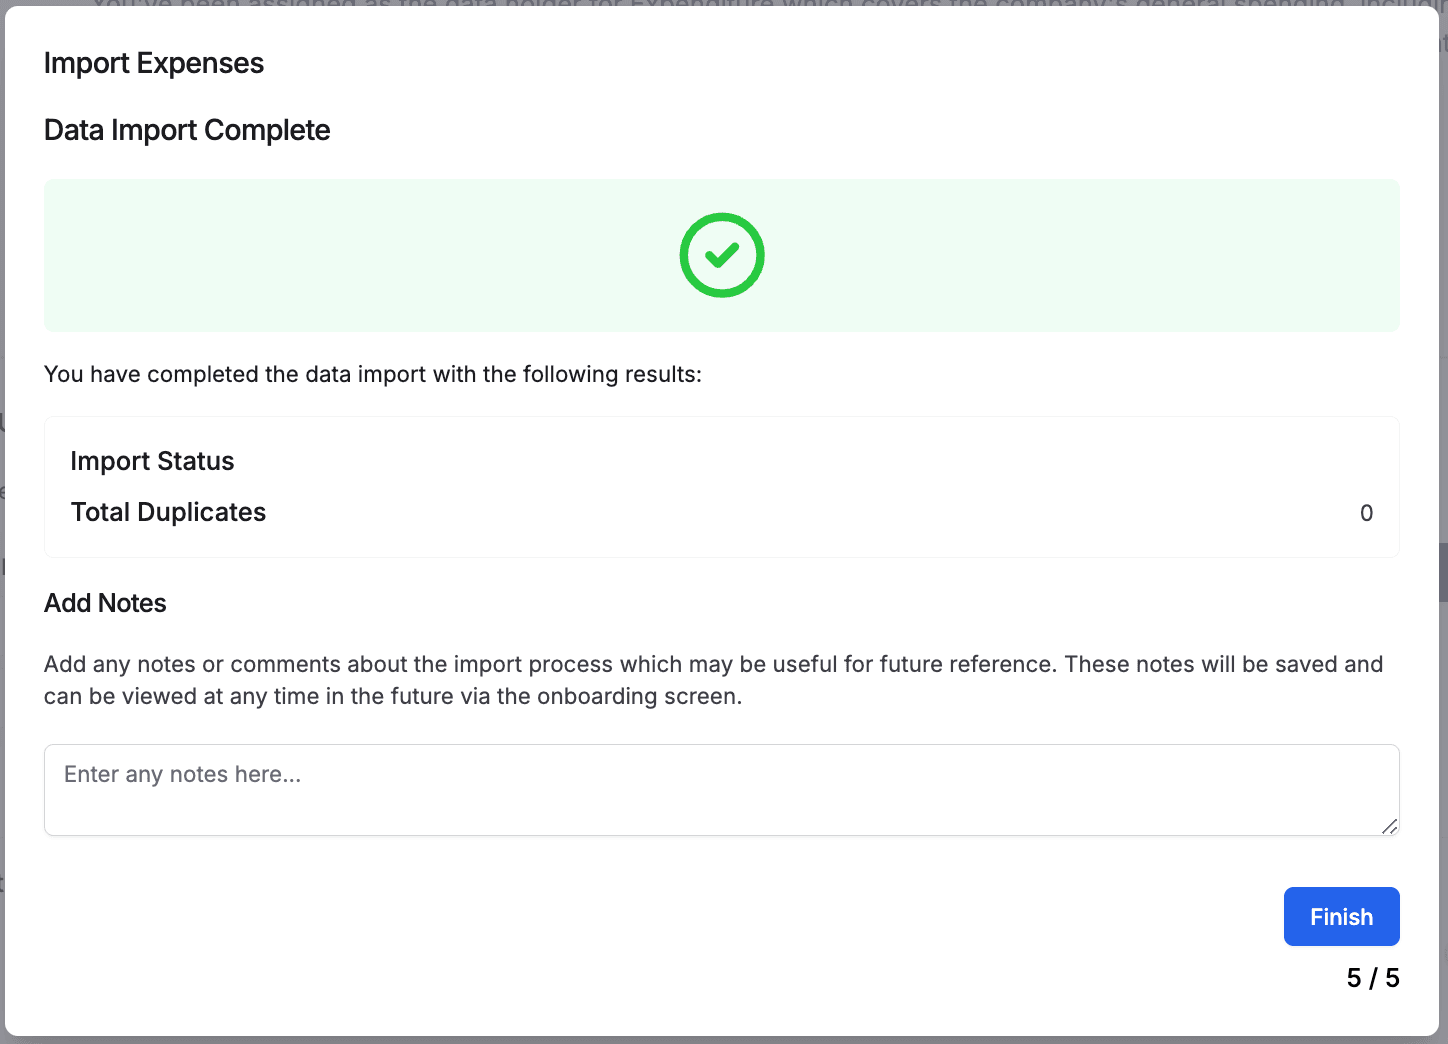
The results of your import will show.
Any duplicate data will not be uploaded.
Click Finish to close the import wizard.
The Recent Uploads table shows you the Status of your data:
Unverified: Indicates that data has been uploaded as a raw file and will need to be processed by the Alectro team manually.
Queued: Indicates data has successfully been imported and is in the queue to be processed.
Underway: Indicates data analysis has been started on the uploaded data
Complete: Indicates data analysis is completed and the results will show in the platform
Once all locations are completed, you can mark the whole section as complete by clicking Mark as Complete.

The section will complete, and you can go back to your to-do list if you have other items to complete, else your work is done!
Your to-do list will now have a completed message in it.

Before uploading your document, ensure that it includes the following required columns:
Missing Columns: Ensure your file contains the required columns.
Incorrect File Format: Verify your file is saved in CSV or XLSX format.
Validation Issues: Check for typos or inconsistencies in your data, such as blank fields or incorrect data formats.
Data Formatting:
Purchase Data: Ensure this column is in a date format upon upload - we suggest YYYY/MM/DD to ensure consistency
Spend: This must be a number and not include currency symbols
Expenditure Reference: If this is not a unique reference it may cause issued with the duplicate removal process
Location ID: The Location ID can be obtained from the template download step and must be one of the company specific IDs.
The data must be in the correct format to upload - please ensure that each column is in its correct format.
Expenditure data is crucial for the analysis to take place. Without spend data, there is no way to quantify the material impact of the company over the year. That being said, there is also no way to do traditional financial accounting without this spend data being tracked! Therefore, every single organisation needs this data for accounting purposes, and so it should be available within the company.
At a top level, anything that the business spends during the year could contribute to the carbon impact. However, items like taxes, payroll, bank fees, revaluations, and depreciations can be excluded.