By continuing, you agree to our use of cookies.
You’ve Been Assigned as the Data Holder for Employee Management / HR.
As the designated data holder, you’re responsible for uploading and maintaining the Employee List throughout the reporting period. This includes keeping the list up to date as employees join or leave, and updating email addresses when necessary (e.g., due to name changes after marriage or a transition to a new email domain).
If you believe you’ve been assigned this role in error, please contact your Admin or the Alectro team.
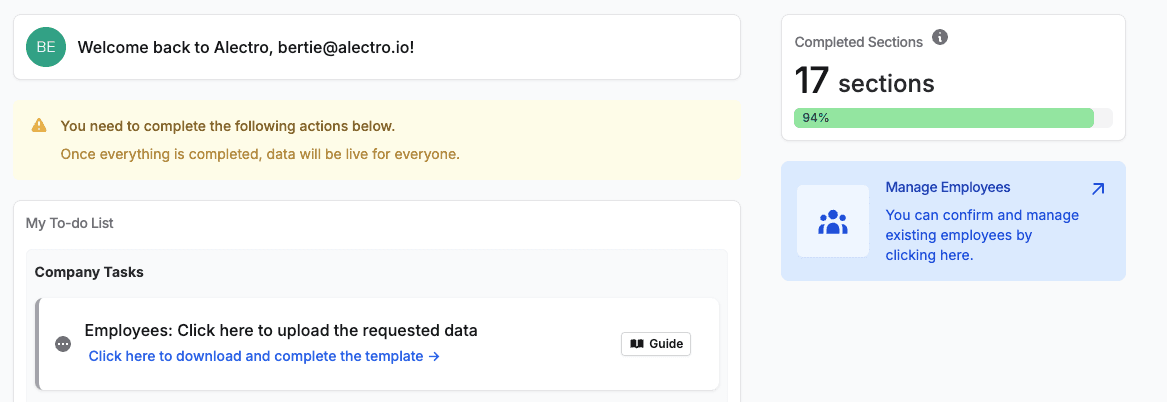
You'll see the following task in your to-do list here: vso.alectro.io/todo-list.
You can access the Manage Employees section by:
Clicking the task in your to-do list, or
Navigating to the Manage Employees tab in Overview.
This guide will help you to upload the data in the required format.
Most of the required information is available within your own systems, making it easy to complete the template and upload the data.
To create a user, we require an employee list covering the analysis period. This list should contain employee names, emails, start dates, office locations, and their employment status (full-time or part-time).
For instance, if the analysis period is from 01/01/2023 to 31/12/2023, please include all current employees who have worked at the company from 01/01/2023 until today.
We won't be reaching out to individuals who are no longer with the company.
You can download a template for collecting the data before uploading it, if needed.
Click here to download the template.
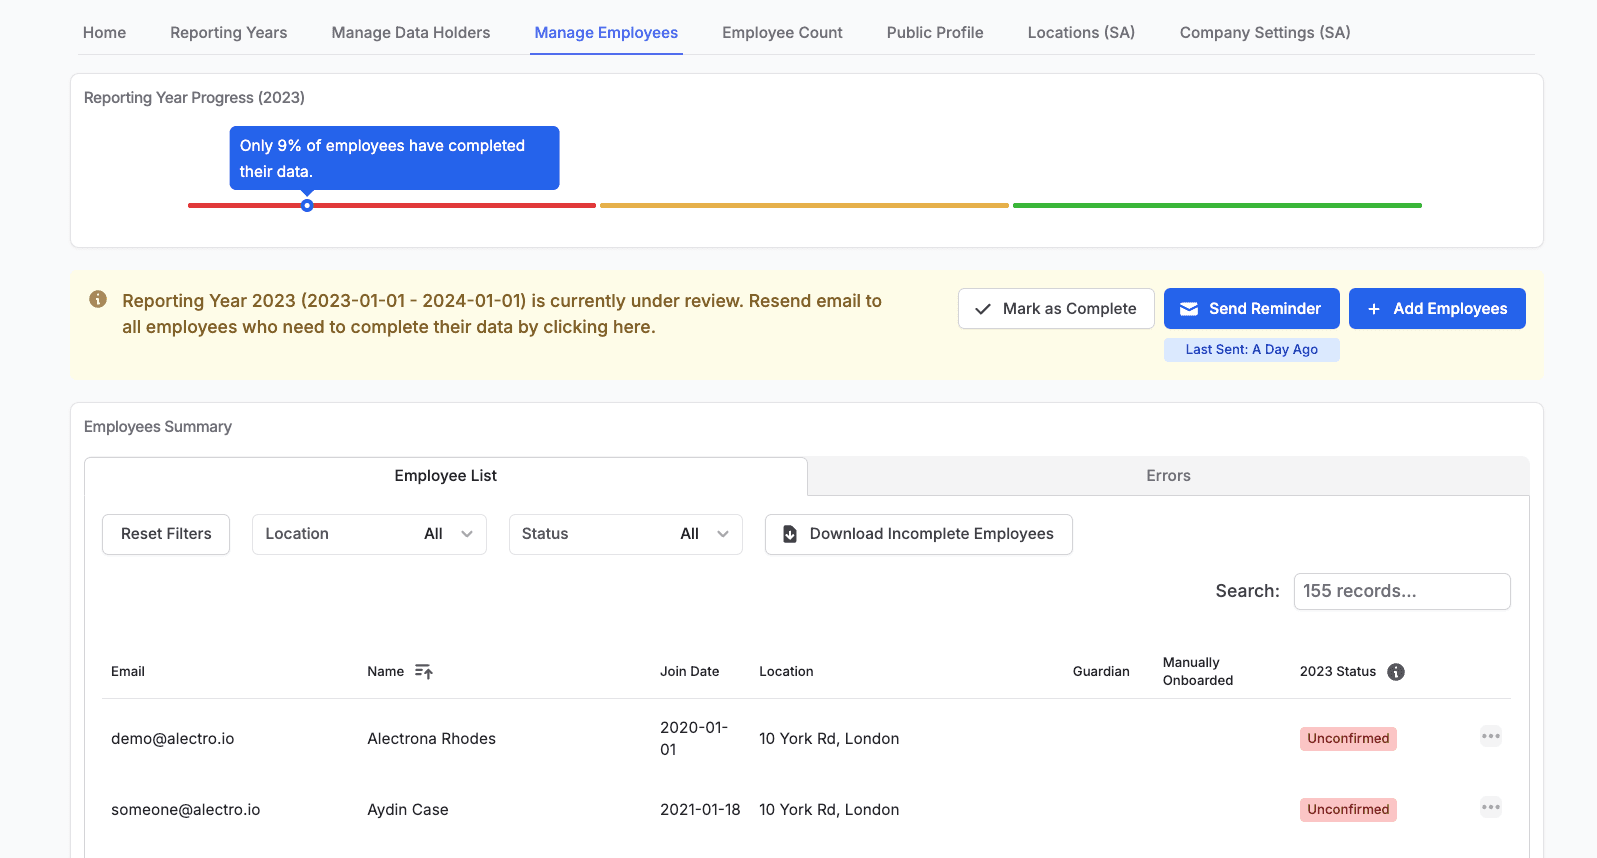
When you click to begin your task, you'll see the Manage Employees page.
You can either:
Download our Excel/CSV template
Use your own file, ensuring it includes the required columns:
Email, First Name, Last Name, Start Date, Primary Location ID, Employee FTE
💡 Most of this data can be exported from your HR or payroll systems.
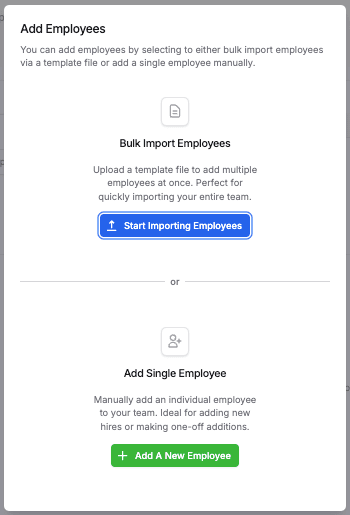
On the Manage Employees page, click + Add Employees. You’ll see two options:
Add Single User: use this option to add a single user directly to the platfrom (Add single user →)
Bulk Import Employees: use this option to bulk upload users (Start Import Wizard →)
Both methods require the same data fields.
Regardless of which option you select, you'll still be entering the same data:
First Name: The employee name is used to personalise the platform. They can change this later in the process.
Last Name: The employee name is used to personalise the platform. They can change this later in the process.
Email: This is the employee's company email address. We will use this to allow them to login to the platform, and enter their own data for onboarding.
Start Date: Enter the date that the employee joined the company. If the employee joined the company before the period of analysis, and the start date is unknown, then use the start of the analysis period. For example, if the period of analysis is 01/01/2023 - 31/12/2023 then please use 01/01/2023 as the start date if it is unknown.
Primary Location: While many employees may have flexible working arrangements, please assign a primary location for each employee — even if they work entirely remotely. For remote employees, use the location they are contracted out of. If no location is specified in their employment contract, assign them to your company’s headquarters.
For Single User Import: You can select a location from the dropdown list
For Bulk User Import: Please assign a location ID to each employee — this can be updated later if needed. To find the location IDs, go to + Add Employees, select the Bulk Import option, and scroll to the bottom of the page.
Full Time Status
For Single User Import: The average weekly hours of the employee (assuming a 40h week is fulltime)
For Bulk User Import: Use the Employee Full Time Equivalent (FTE) value, where 1 represents full time based on a 40-hour week. Assign this value; for example, 0.5 equals 20 hours a week, and 0.8 corresponds to a four-day workweek.
Adding a single user is straightforward, as you can just complete the form with the user details.
The user will receive a welcome email once you click the Add User button.

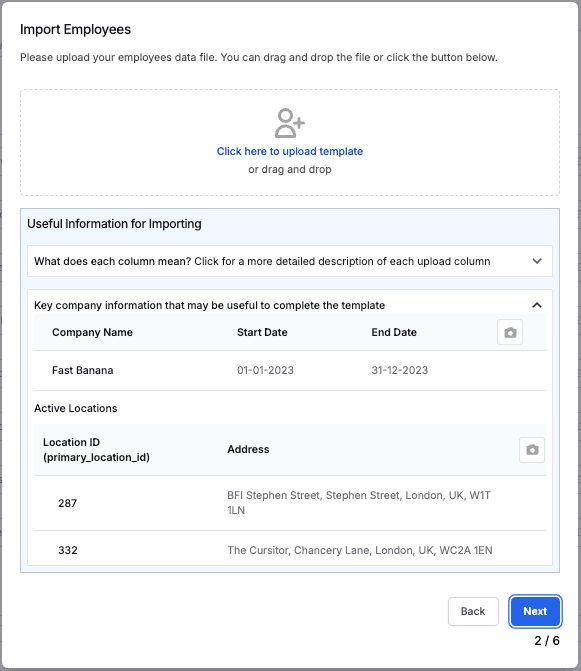
Use this option to bulk upload users simultaneously.
You can download the template by clicking the Download Template button, or use your own excel template.
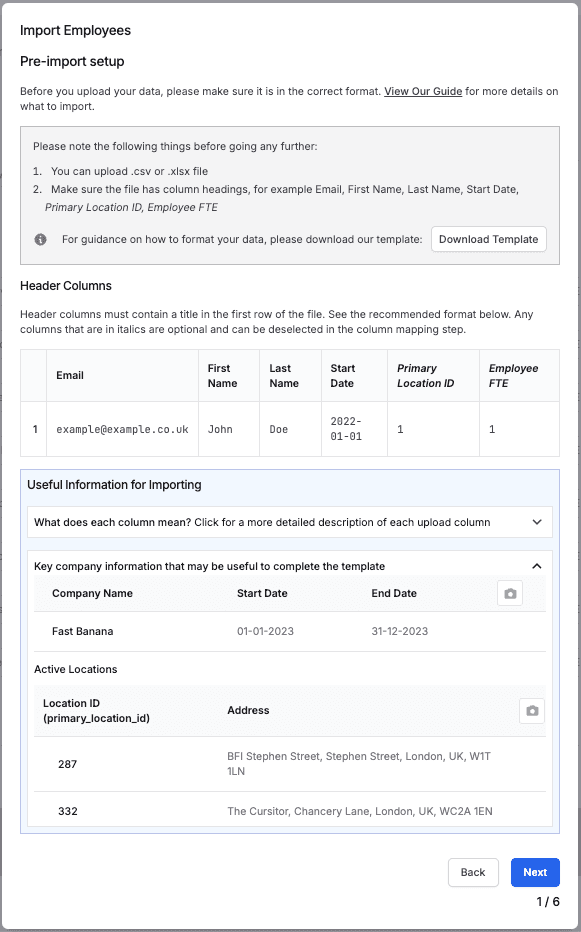
Please note the following points before going any further:
You can upload a .csv or .xlsx file
Make sure the file has column headings, for example Email, First Name, Last Name, Start Date, Primary Location ID, Employee FTE
Please note the 'Header Columns' and 'Useful Information for Importing' sections to make sure that the data you're uploading is correct. The optional columns (Primary Location ID, and Employee FTE) can be selected/deselected in the Column Mapping step.
Once you have completed the template you can upload the file.
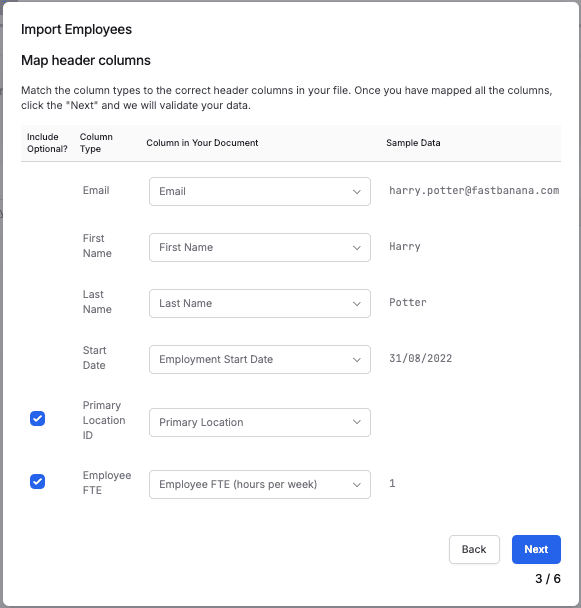
Match the column types to the correct header columns in your file. Once you have mapped all the columns, click Next and we will validate your data.
If you deselect Primary Location ID and/or Employee FTE then these columns will be ignored in the upload step:
Primary Location ID: Deselecting this column will mean you have to map each employee to a location at a later stage
Employee FTE will default to 1 if left blank
If there are errors in your data, these will be highlighted once you click Next. For more information on these errors go to the Common Errors section in this guide.
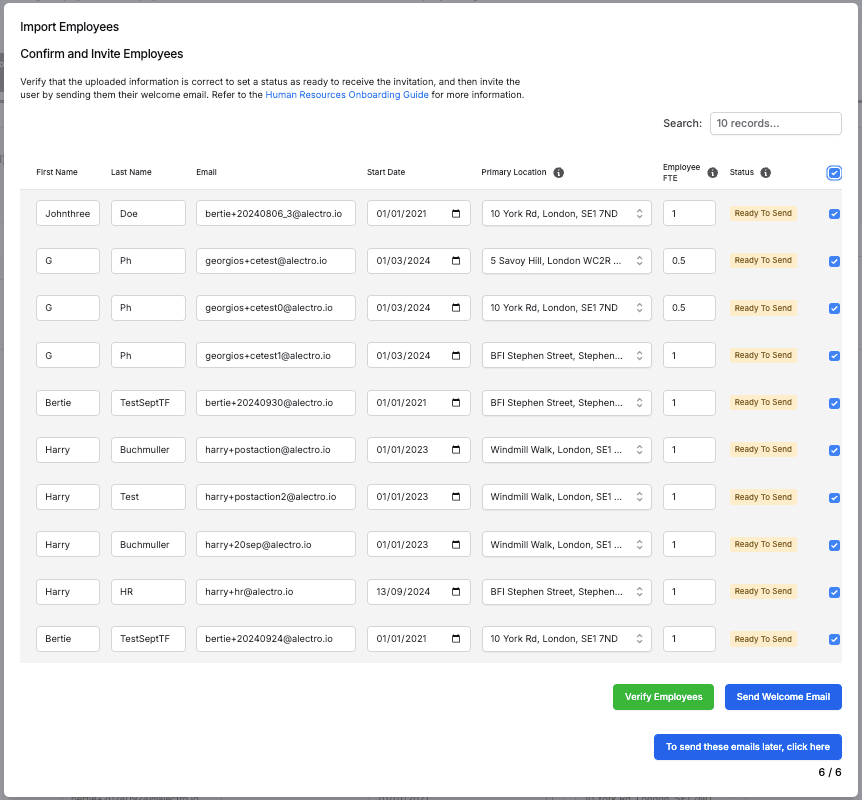
Please review the data below and click Import to upload the data into your Virtual Sustainability Officer® when you're ready.

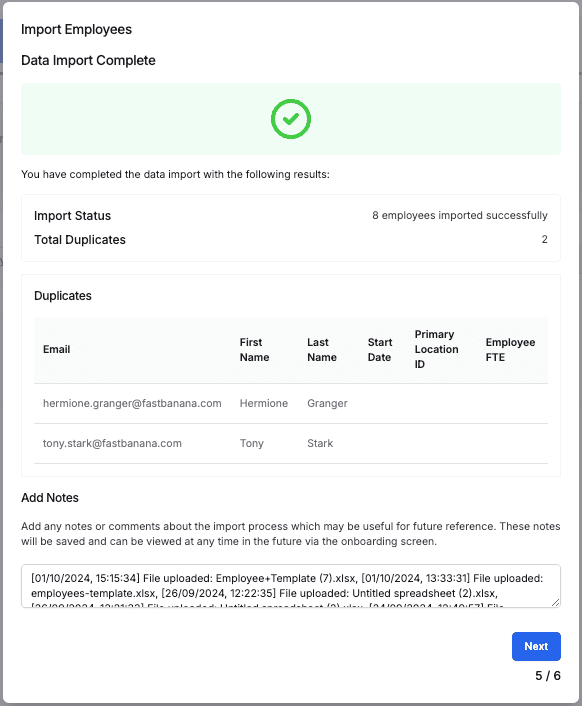
You have completed the data import and your results are listed:
Import Status: This will tell you the number of employees you've successfully imported
Total Duplicates: This will tell you how may email addresses already existed in the platform, so haven't been created. You will see a list of them in the Duplicates table.
You have two options to complete the process:
You can select all the rows, and then click to Verify Employees then Send Welcome Email to invite employees immediately.
Or you can click to send these emails later by clicking "invite employees at a later stage."
For more details on either option, see the section below on Verfiying and Inviting Users
Once employee details have been uploaded to the platform, they need to be sent their Welcome Email. If you've chosen to delay this, you can do it at any stage from the Manage Employees page.
Any employees who haven't been sent their email yet will be shown in the Errors tab.

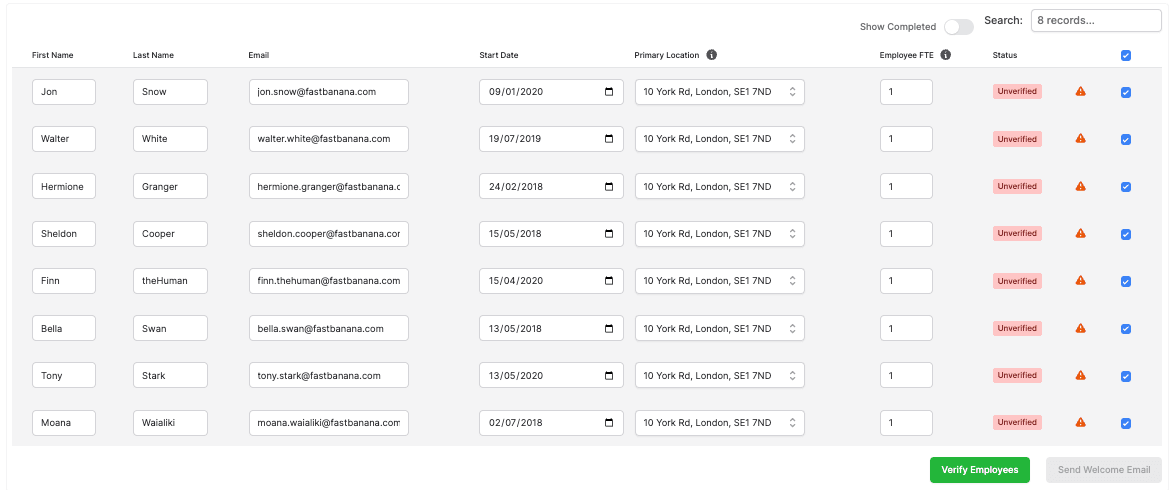
Each user must be assigned a Primary Location, and have the rest of their data checked.
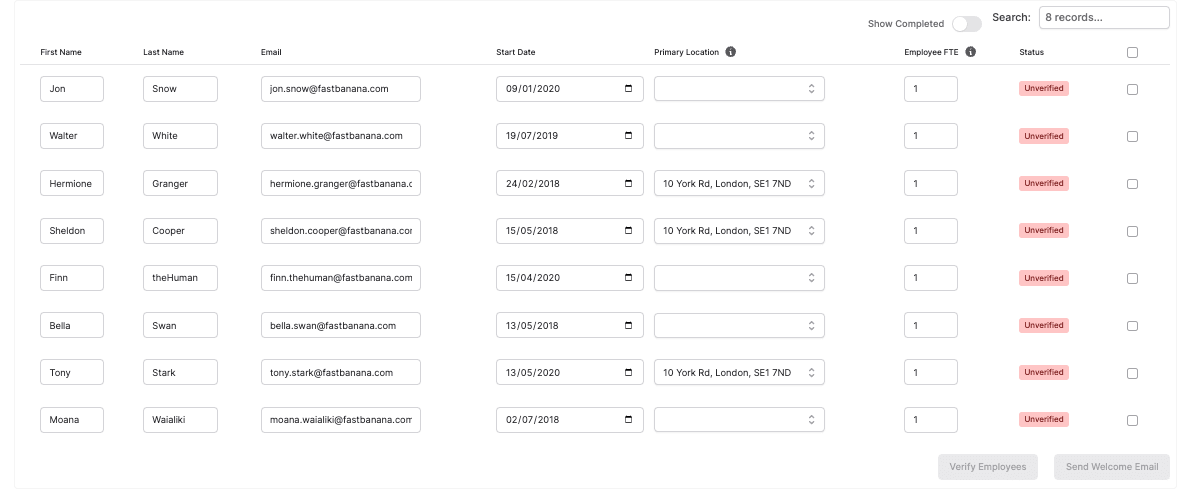
Once you've made your edits, check the box on the right hand side, and click to Verify Employees.
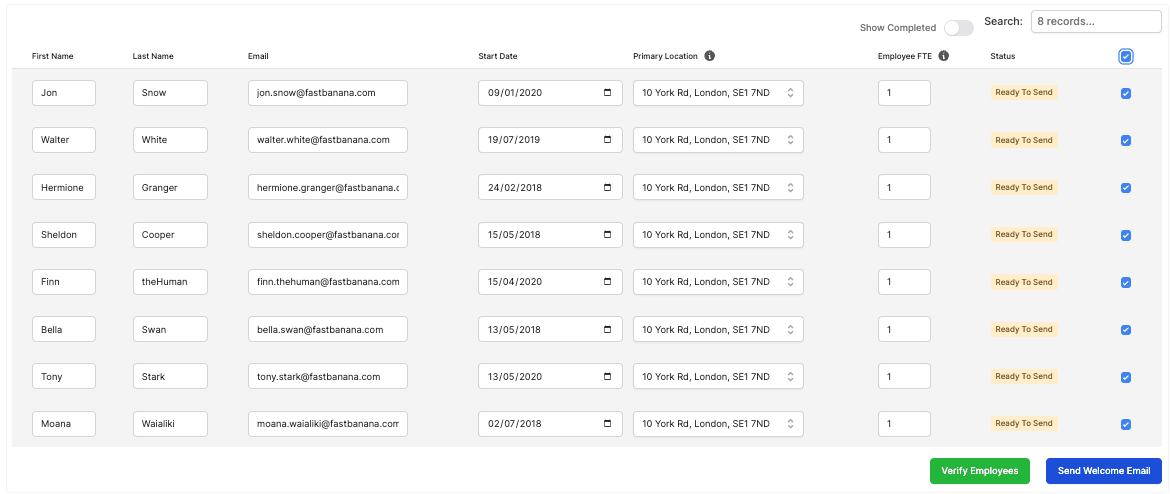
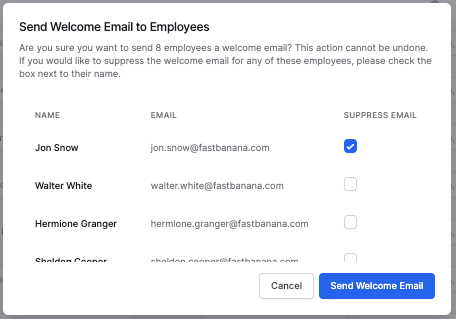
These employees are now ready to be invited to the Virtual Sustainability Officer®. Select the users you would like to invite, and click Send Welcome Email
As a final step, you will be asked to confirm this action. Please note, this cannot be undone so once you click Send Welcome Email the user will have access to the platform.
You can also choose to Suppress Email (adding a user without sending them the welcome email). However, we advise against using this option unless explicitly instructed by the Alectro team. While there are various valid reasons for doing so, if these haven't been discussed with you, please refrain from selecting any of these options. If a user is selected in this step it will set their email preferences to not recieve any mail in the future either.
Your employees are now being added, indicated by the Processing tag.
Any emails that bounce will be show here - this is the result of an incorrect email being added.

The import table will now be empty, and you can view completed employees by clicking the 'Employee List' tab.

Once you've added the users for the reporting year, you can mark this whole section as complete by clicking Mark as Complete.

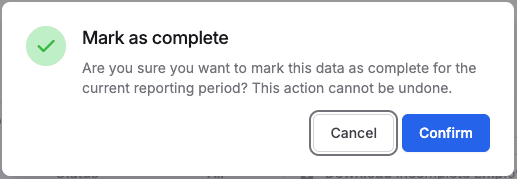
The section will complete, and you can go back to your to-do list if you have other items to complete, else your work is done!

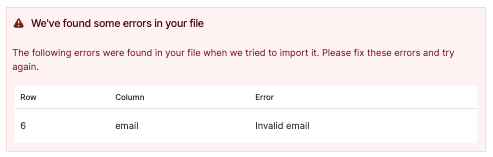
If you get errors in your data upload, they will appear at the end of Stage 3 and you'll be told where they exist in your file
The most common errors can be found below:
Incorrect Column Mapping: You might have mapped a column incorrectly, for example selecting Email as Start Date
Date Format: This could cause an error if the dates in the data don't match the expected format (e.g., MM/DD/YYYY).
Numbers in names: An error may occur if names include numbers, but the system only accepts alphabetic characters.
Spaces in emails: This might result in an error if email addresses contain spaces, which is not allowed in standard email formats.
Employee FTE: This should be a number between 0 and 1, other numbers will not work
Before Sending Welcome Email (these will be shown in the Errors tab)
Unverified: User has not been verified yet and needs to be actioned using the 'Verify Employees' button to be able to send a welcome email.
Ready To Send: User has been verified and is ready to be sent a welcome email.
Processing: User's welcome email is being sent.
Bounced: User's welcome email has bounced. Please fix the email and submit to re-send the employee's welcome email.
During an Under-Review period (so when reporting is progress), all of the following will be shown:
Confirmed: User has verified their information for this reporting period.
Partly Confirmed: User hasn't completed data confirmation for this reporting period.
Unconfirmed: User onboarded in a prior year but must confirm their data for this period.
Onboarding Incomplete: User has never logged in or completed onboarding.
New Employee: User finished onboarding but was inactive this reporting period.
Active Year: No action needed, currently in an active reporting period.
During an Active Year (i.e., when reporting is not in progress), only two statuses will be displayed: Active Year and Onboarding Incomplete.
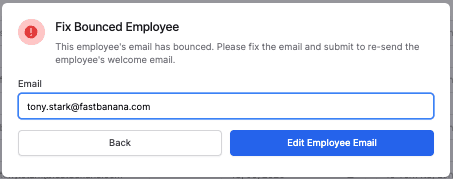
Some emails bounce when they are created. This is a result of an incorrect email address being added.
To correct this issue, you can click the red error icon, enter the correct email address, and click Edit Employee Email.
This will send the user a new welcome email, inviting them to complete the onboarding process.
Please use data as accurate as possible to complete this. Email is the most important component of the analysis, as we can then ask individuals to complete any information that is missing.
When adding dates, the month is more important than the day, so the 1st or last day of the month is sufficient in most cases.
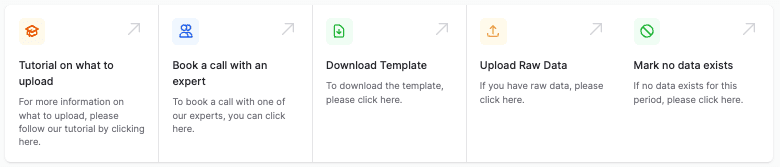
At the bottom of the page, you're given additional options including:
Book a call with an expert: This will give you the option to book a call with our support team where they can run you through the data and the process
Upload Raw Data: If you are having any issues with the import wizard, then you can send raw data to the Alectro team for them to process.